
Getting started with PyQt5
When you start learning to code, you typically begin by writing programs that have a very simple interface. The user interacts (if at all) with your program by providing text input in a console window, and the output of your program is likewise restricted to text output.
This is all very fine, but at some point you might start to feel that you need to write a ‘real’ program (you know, one with menus, buttons and so on). This can happen when you have written code that solves some practical problem, but now other people also want to solve the same problem with your code. If these people know how to program you can simply share your code, but if they are less tech savvy, creating a graphical user interface (GUI) that hides the details of your code is always a nice gesture.
In this post I will demonstrate how you can use QtDesigner to draw the visual interface of a ToDo application. I will then show how you can use the PyQt5 module to implement the code so that we end up with a functional ToDo application. As usual, I will use the Anaconda Python distribution which comes with both the designer software as well as the module by default.
Motivation for using PyQt5
A first decision you’ll have to make is which framework to use. There are in fact multiple frameworks that you could use. My personal experience is limited to Tkinter and PyQt. Of these two I prefer PyQt for the following reasons:
• It’s part of the Anaconda distribution (also applies to TKinter)
• It comes with a ‘Designer’ that allows you to draw your interface without needing to do any coding. This is a huge time saver compared to designing your interface using only code! (this isn't the case for TKinter)
• It’s not too difficult to find solutions online if you are stuck with the framework (I generally found it more difficult to find good solutions for TKinter when the problems I needed to solve became more specific)
• It’s a very mature framework (also applies to TkInter)
• The resulting program has a nice look (isn't really the case for TkInter applications)
The only thing you need to be aware of is that the PyQt is included in Anaconda with a license that permits its use in open source project, but not in commercial applications. If that is the case you either need to acquire a commercial license or switch to a different framework.
QtDesigner: an overview
Libraries such as TKinter require you to 'code' the user interface. But as a user interface is something visual, I find it more intuitive to create it using a drag and drop approach where you simply place the components where you want them to appear. PyQt comes with the QtDesigner software that allows you to do just that. It is located in the folder ‘ANACONDA_FOLDER\Library\bin\designer.exe’, where ANACONDA_FOLDER is your Anaconda installation folder.
The first thing you will get is a startup window with a selection of ‘template’ programs. Here we select the option 'Main Window':
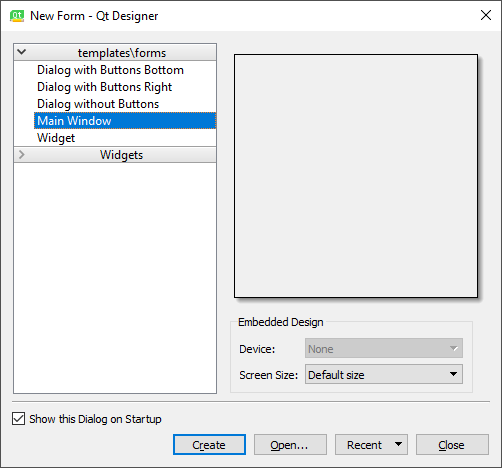
Figure 1: Creating a new Main Window
After clicking create, we get in the main view of the designer. This view consists of a Widget Box, an Object Inspector, the Property Editor and of course a preview of the window.
The Widget Box is located on the left and has a selection of components avaible that you can simply drag and drop into your window. They range from simple widgets that act as text input (e.g., the Line Edit Input Widget) to very complex components that can mimick the behavior of a web browser (e.g., the QWebEngineView Dispay Widget).
The Object Inspector is located in the top right. It shows a hierarchical overview of all the components ithat you have added to our widow. By default it already contains a status bar and a menu bar. A 'centralwidget' is also already in place. You can think of this as a 'root widget' to which all further widgets that you add will belong
The Property Editor is located underneath the Object Inspector. Each widget has a set of properties that define how it looks and behaves. This includes both general properties that are common to all widgets, such as position and size (which can be found under the geometry specification), as well as more specific properties (e.g. the text property for the QLabel widget). All these properties can be modified here or adjusted programmatically in your code.
Todo Application: Designing the GUI
Let's start by designing our ToDo application! I will use the following four widgets to create the user interface:
• A QLabel widget with an instruction to describe a to-do item
• A QLineEdit widget in which a user can enter the description.
• A QPushButton that adds the item to the list
• A QListWidget that will hold all the items added so far. Make sure to select the Item-Based widget here.
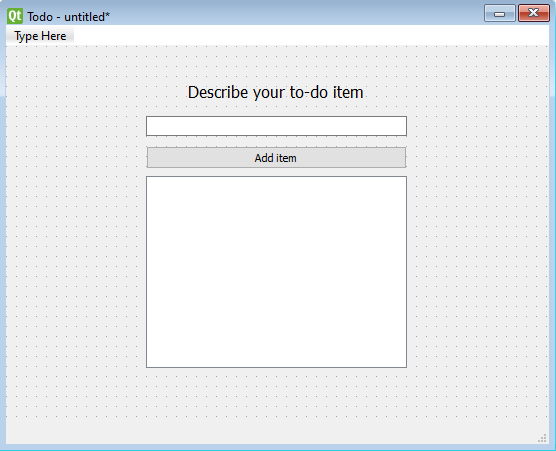
Figure 2: The preview in QtDesigner
Except for the QLabel widget, I have provided a more descriptive name for the three other widgets by changing the the objectName property in the Property Editor. We will use these names when we want to refer to these components later in our Python code, so it is always a good idea to pick a name that is meaningful and represents what the component does: new_todo_text (QLineEdit), add_todo_button (QPushButton) and todo_list (QListWidget).
When we are happy with how our design looks, we can save it. This will create a .ui file that we can now load in our Python code so that we can actually run the program!
ToDo Application: Minimal Python Code
To get our Todo application running we need to create window object and point it to the user interface specification we just created. The approach we will take is to design a class that represents our window and then instantiate an object of that class. This class will derive from the QtWidgets.QMainWindow class. If you are not familiar with Object Oriented Programming (OOP), you can try to imagine that even a simple window already has a lot of behaviors (hovering over the edge allows you to resize it, you can press the minimize, maximize and close button in the upper right corner and so on). The code for this behavior is already implemented in the QtWidgets.QMainWindow class, so by inheriting from that class you get all that behavior out of the box. It is then up to you to extend that class so that it also includes behavior that is specific to your application.
Before creating the class, we first need to import several modules. The uic module helps with reading and setting the design that we just created. We also import the QMainWindow and the QApplication modules. Every application that you run has an event loop that continuously monitors events that occur on your system, such as a user moving the mouse cursor. A component in your application gets notified of these events, and can react to them if the appropriate code has been written. The QApplication module basically represents this event loop. The QMainWindow is a component in our application and corresponds to the interface we just designed.
# Import modules
import sys
from PyQt5 import uic
from PyQt5.QtWidgets import QApplication, QMainWindow

# Create the window class
class ToDo(QMainWindow):
    def __init__(self):
        super().__init__()
        uic.loadUi('todo.ui', self)

        self.show()

# Run the application
app = QApplication(sys.argv)
todo_window = ToDo()
app.exec_()
We then start by creating an UI class that dervies from QMainWindow. The __init__ function first calls the constructor of the parent class. We then load the .ui file by calling the .loadUi function from the uic module. If you are working in Spyder, you need to make sure that the .ui file exists in your working directory for this to work. The final line of code in the constructor instructs the window to show itself.
After creating the class, we continue by first instantiating a QApplication object. This is followed by creating an instance of our ToDo window class. The final line of code starts the event loop and will run our application.
A small note: I found that when running the script directly from Spyder I occassionally have some issues with properly quitting the application. Therefore my workflow is to use Spyder to write the code for the application and then launch the application from the command line using the syntax 'python todo.py' (or whatever name you have given your script)
ToDo Application: Extended Python code
After we have verified that our application runs without any errors, we can further extend the code and implement the functionality of adding the text to the list when the button is clicked. First, we need to tell our program what to do when the button is clicked. We will add a function add_todo_button_clicked to our class that implements the behavior that we need.
class ToDo(QMainWindow):
    def __init__(self):
        super().__init__()
        uic.loadUi(ui_file, self)

        # Connect the click event with a callback function
        self.add_todo_button.clicked.connect(self.add_todo_button_clicked)

        # Show the window
        self.show()

    def add_todo_button_clicked(self):
        new_item = self.new_todo_text.text()
        self.todo_list.addItem(new_item)
        self.new_todo_text.clear()
In this function, we first use the .text() function of the QLineEdit widget to get a string variable that represents any text that was typed in this widget. As you can see, we are also refering to the widget using the name we specified in QtDesigner. The QListWidget has a .addItem() function which takes a string as an argument. Executing this function will add the content of that string to the list. Finally, we use the .clear() function to clear the content of the QLineEdit widget.
Now that we have defined the function, we need to tell our application to use this function when the button is clicked. Using PyQt terminology, we need to connect the 'clicked' event to a target function. This connection is specified in the class constructor. Specifically, our button as a .clicked.connect() function to which we provide the name of the function we just created. And that's it. If you know launch the program you should have a fully functional application!
This is just a simple example but it captures the general procedure that should be followed when you want to add new functionality to your application: first define the functionality that you need and extend your class by writing a function that implements this behavior. Then, look into the exact syntax needed to connect this function with the event that is happening in our application. For example, when a menu item is clicked you would need to use triggered.connect() instead of the clicked.connect(). If you click an item in a list you can use the itemClicked.connect() to react to that event and so on. Finding out the correct syntax for solving what you want to achieve is of course part of the fun of developing a GUI application!
Additional resources
https://zetcode.com/gui/pyqt5/